This post explains how I control our home's central ventilation system through Home Assistant, a Raspberry Pi and a relay board. Simple, cheap and effective - without soldering.
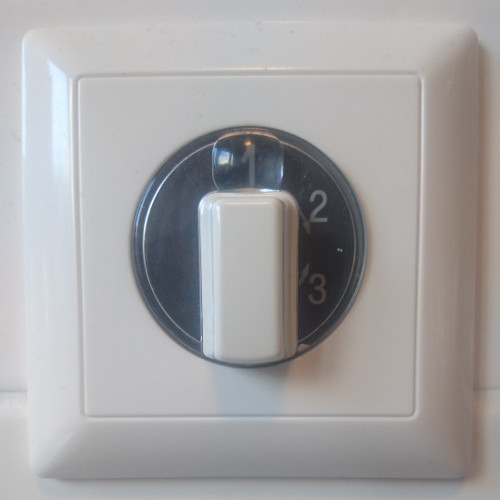
Our house has a 'Renovent Excellent' central ventilation system with a heat recovery system. It has a control switch in the kitchen with 3 levels. That's great when we want more circulation while cooking, but the shower is at the first floor and I seem to be incapable of remembering to turn up the circulation before getting into the shower. So I want to be able to control the ventilation from there too.
Of course, the manufacturer offers an off-the-shelve solution for this, but I found EUR 250 a bit steep for a simple transmitter/receiver pair, and didn't really like that it needs batteries.
So I scavenged around and built my own alternative using components I had lying around: the Raspbarry Pi (3) that was already running Home Assistent, a 4-channel relay module and an old 2x RJ45 wall mount box with screw terminals.
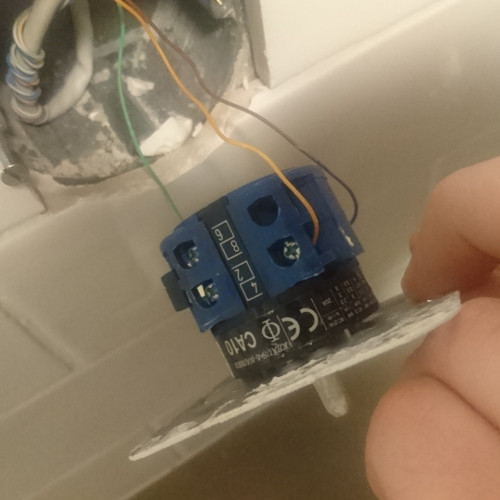
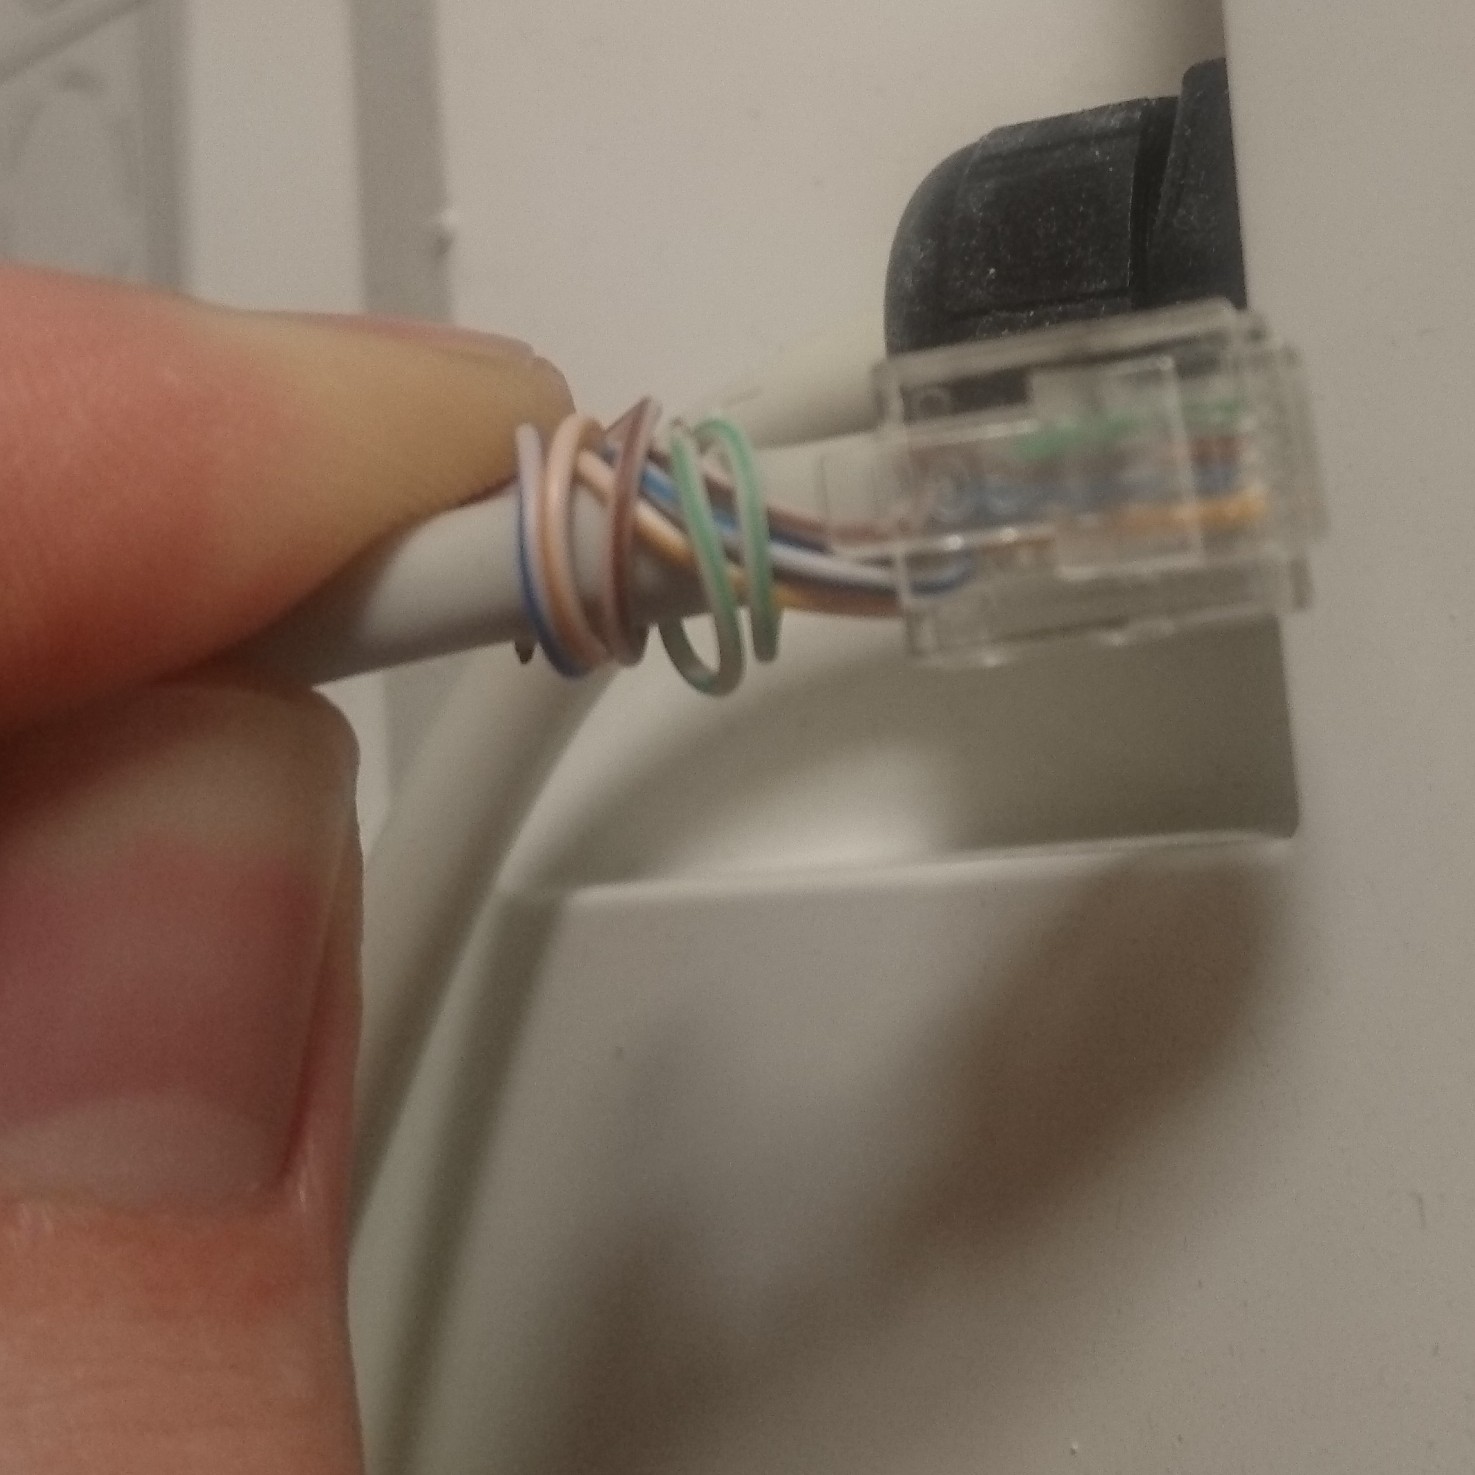
The wall switch is connected to the ventilation box using a CAT5 cable, of which three wires are connected to the wall switch and, at the ventilation box side, four wires are connected to an RJ14 (RJ11 with 4 wires) plug.
Measuring what the kitchen switch does told me:
- Switch position '1': Nothing connected
- Switch position '2': Shorts pin 2 and 4
- Switch position '3': Shorts pin 2 and 5
This begged the question what happens if pin 2 and 3 are shorted, which turns out to enable the 'holiday mode' (even lower than '1').
With that knowledge, we can wire up the relay board. I used relay 1 for mode '2', relay 2 for mode '3' and relay 3 for mode '0/holiday'. To be able to use both the Pi and the kitchen switch, I wired the two RJ45 ports together. After a cutting away a bit of the plastic of the RJ45 box, the relay board fits nicely.
The relay board is connected to the Pi using female-female jumper wires. I used the following wiring:
- Relay board GND - Pi pin 6 (GND)
- Relay board relay 1 - Pi pin 3 (GPIO 2)
- Relay board relay 2 - Pi pin 5 (GPIO 3)
- Relay board relay 3 - Pi pin 7 (GPIO 4)
- Relay board relay 4 - Pi pin 8 (GPIO 14)
- Relay board VCC - Pi pin 4 (5v)
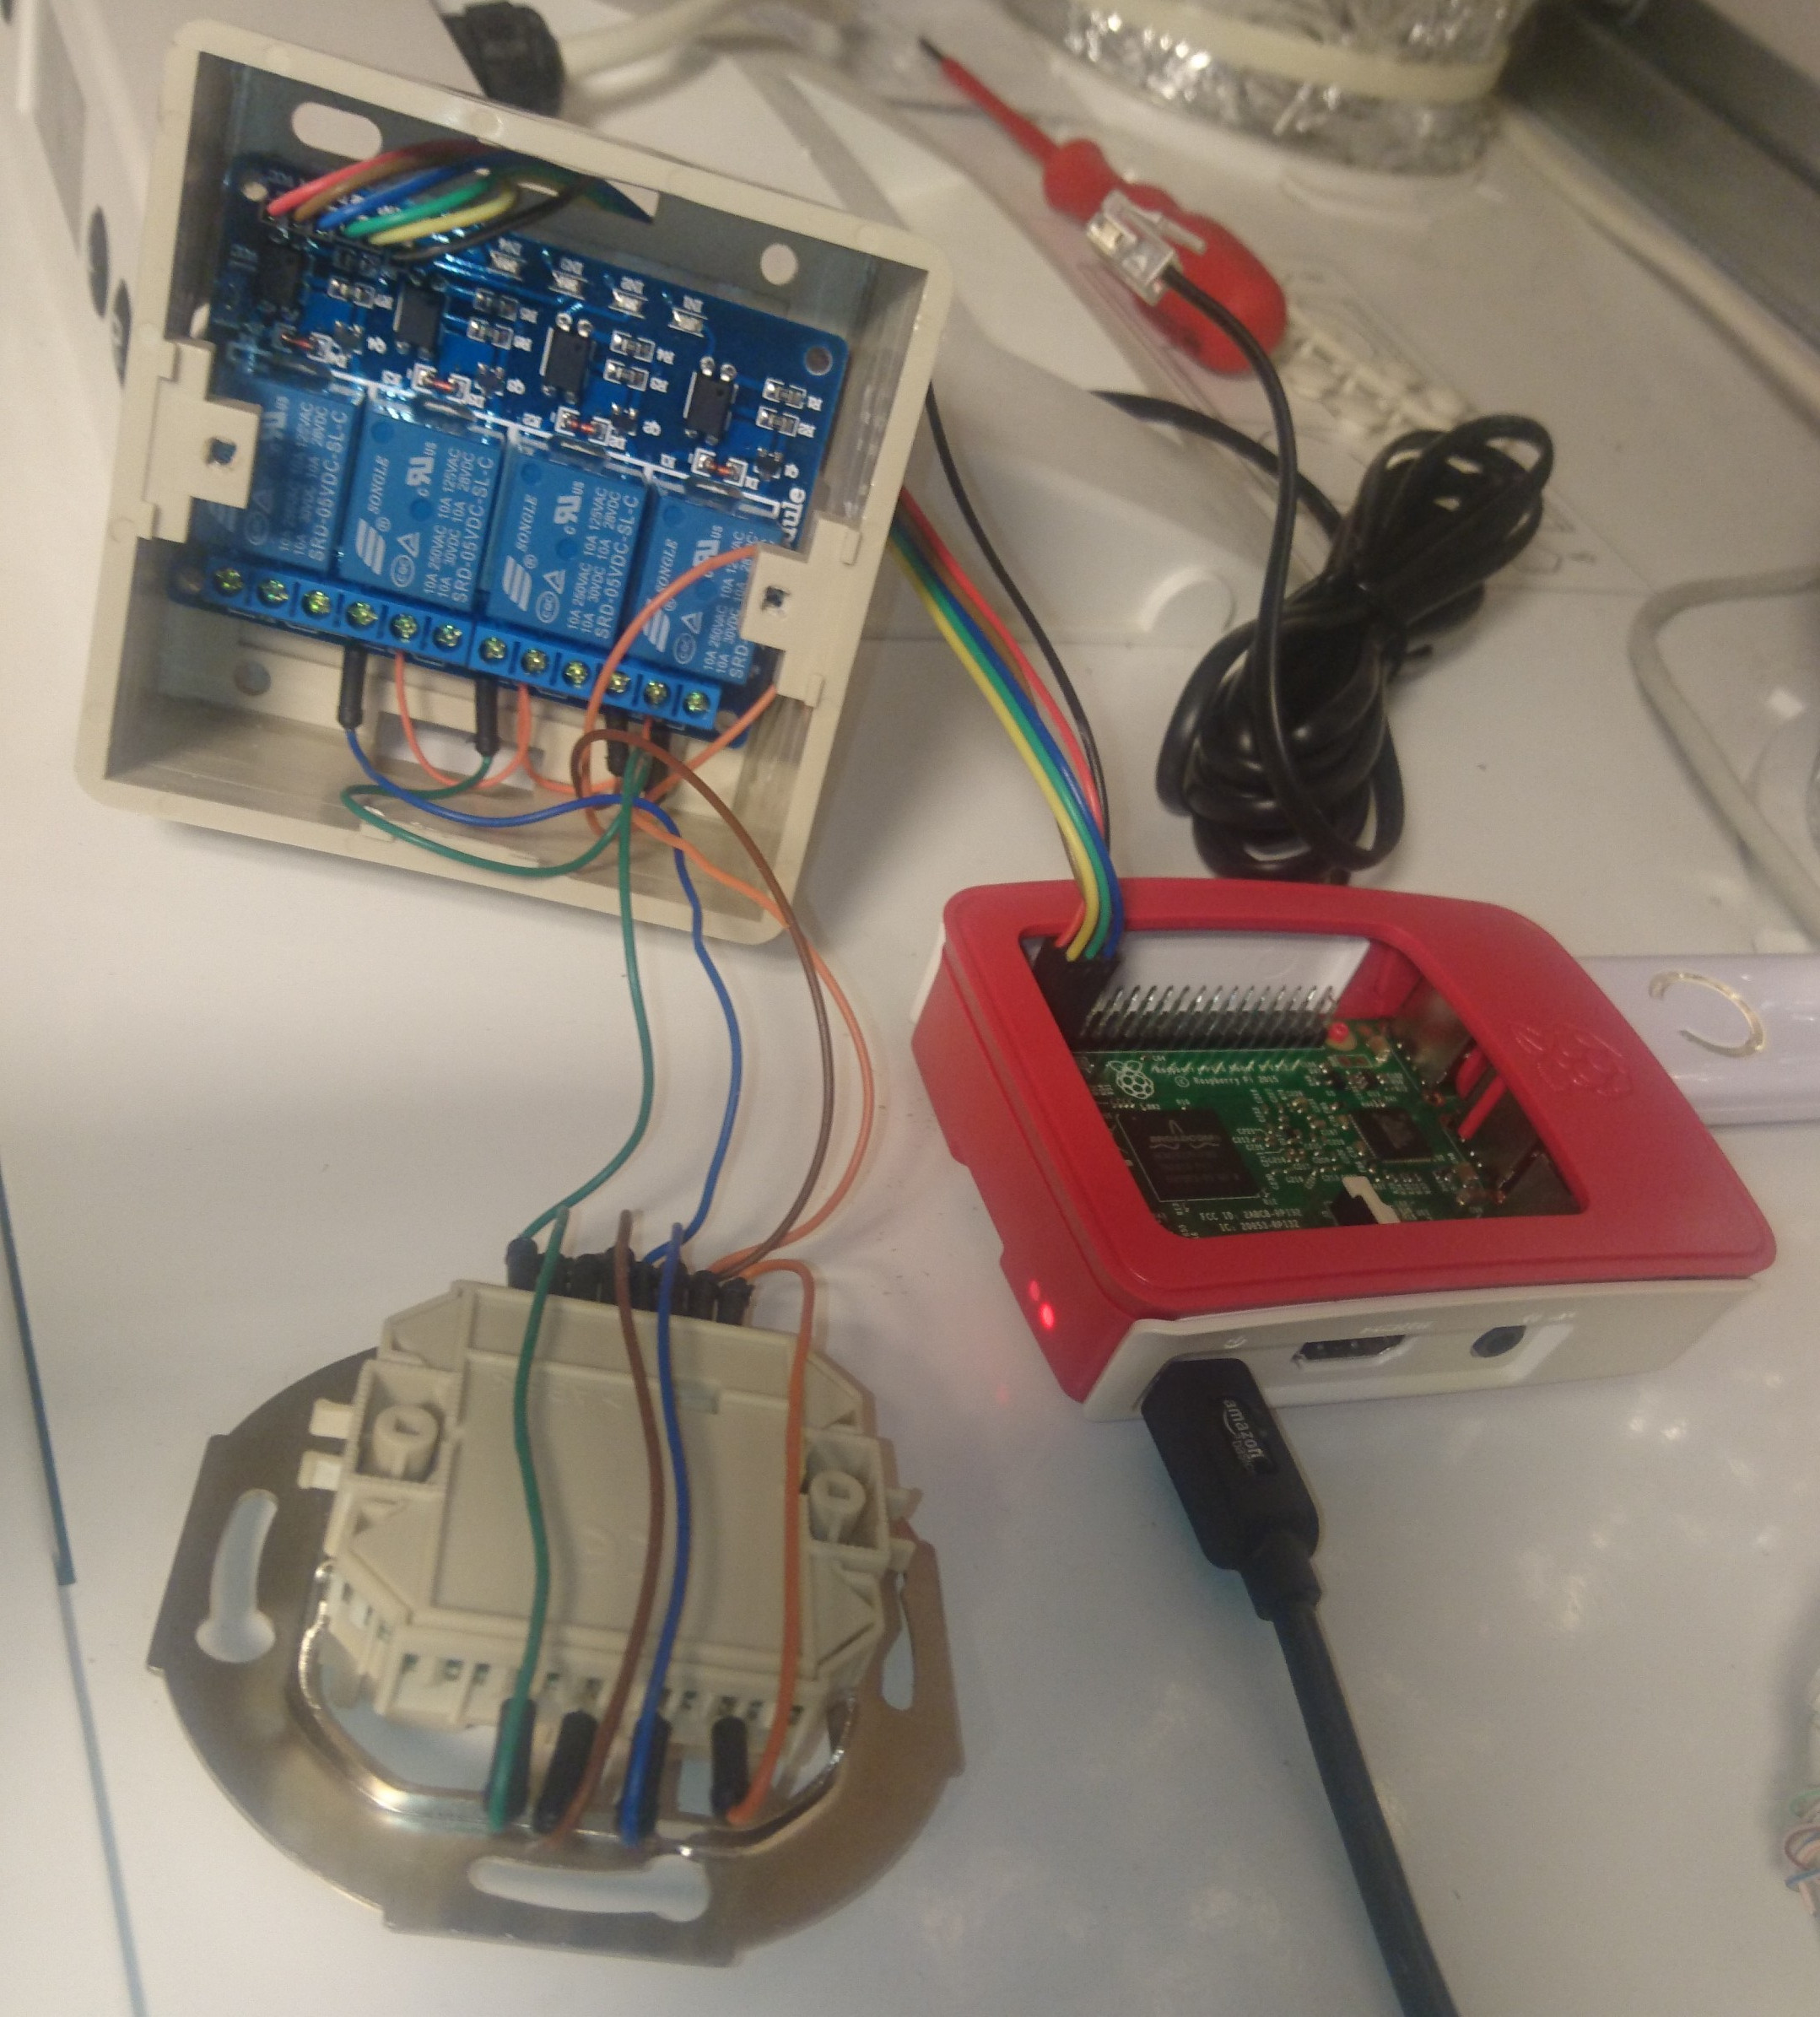
Relay box open
The RJ45 box is not strictly needed. You can just cut the CAT5 cable, strip the wires and connect them directly the relays. But I like that if I somehow break the home automation setup - which I will probably do at some point - I can easily revert to controlling the ventilation with the kitchen switch only.
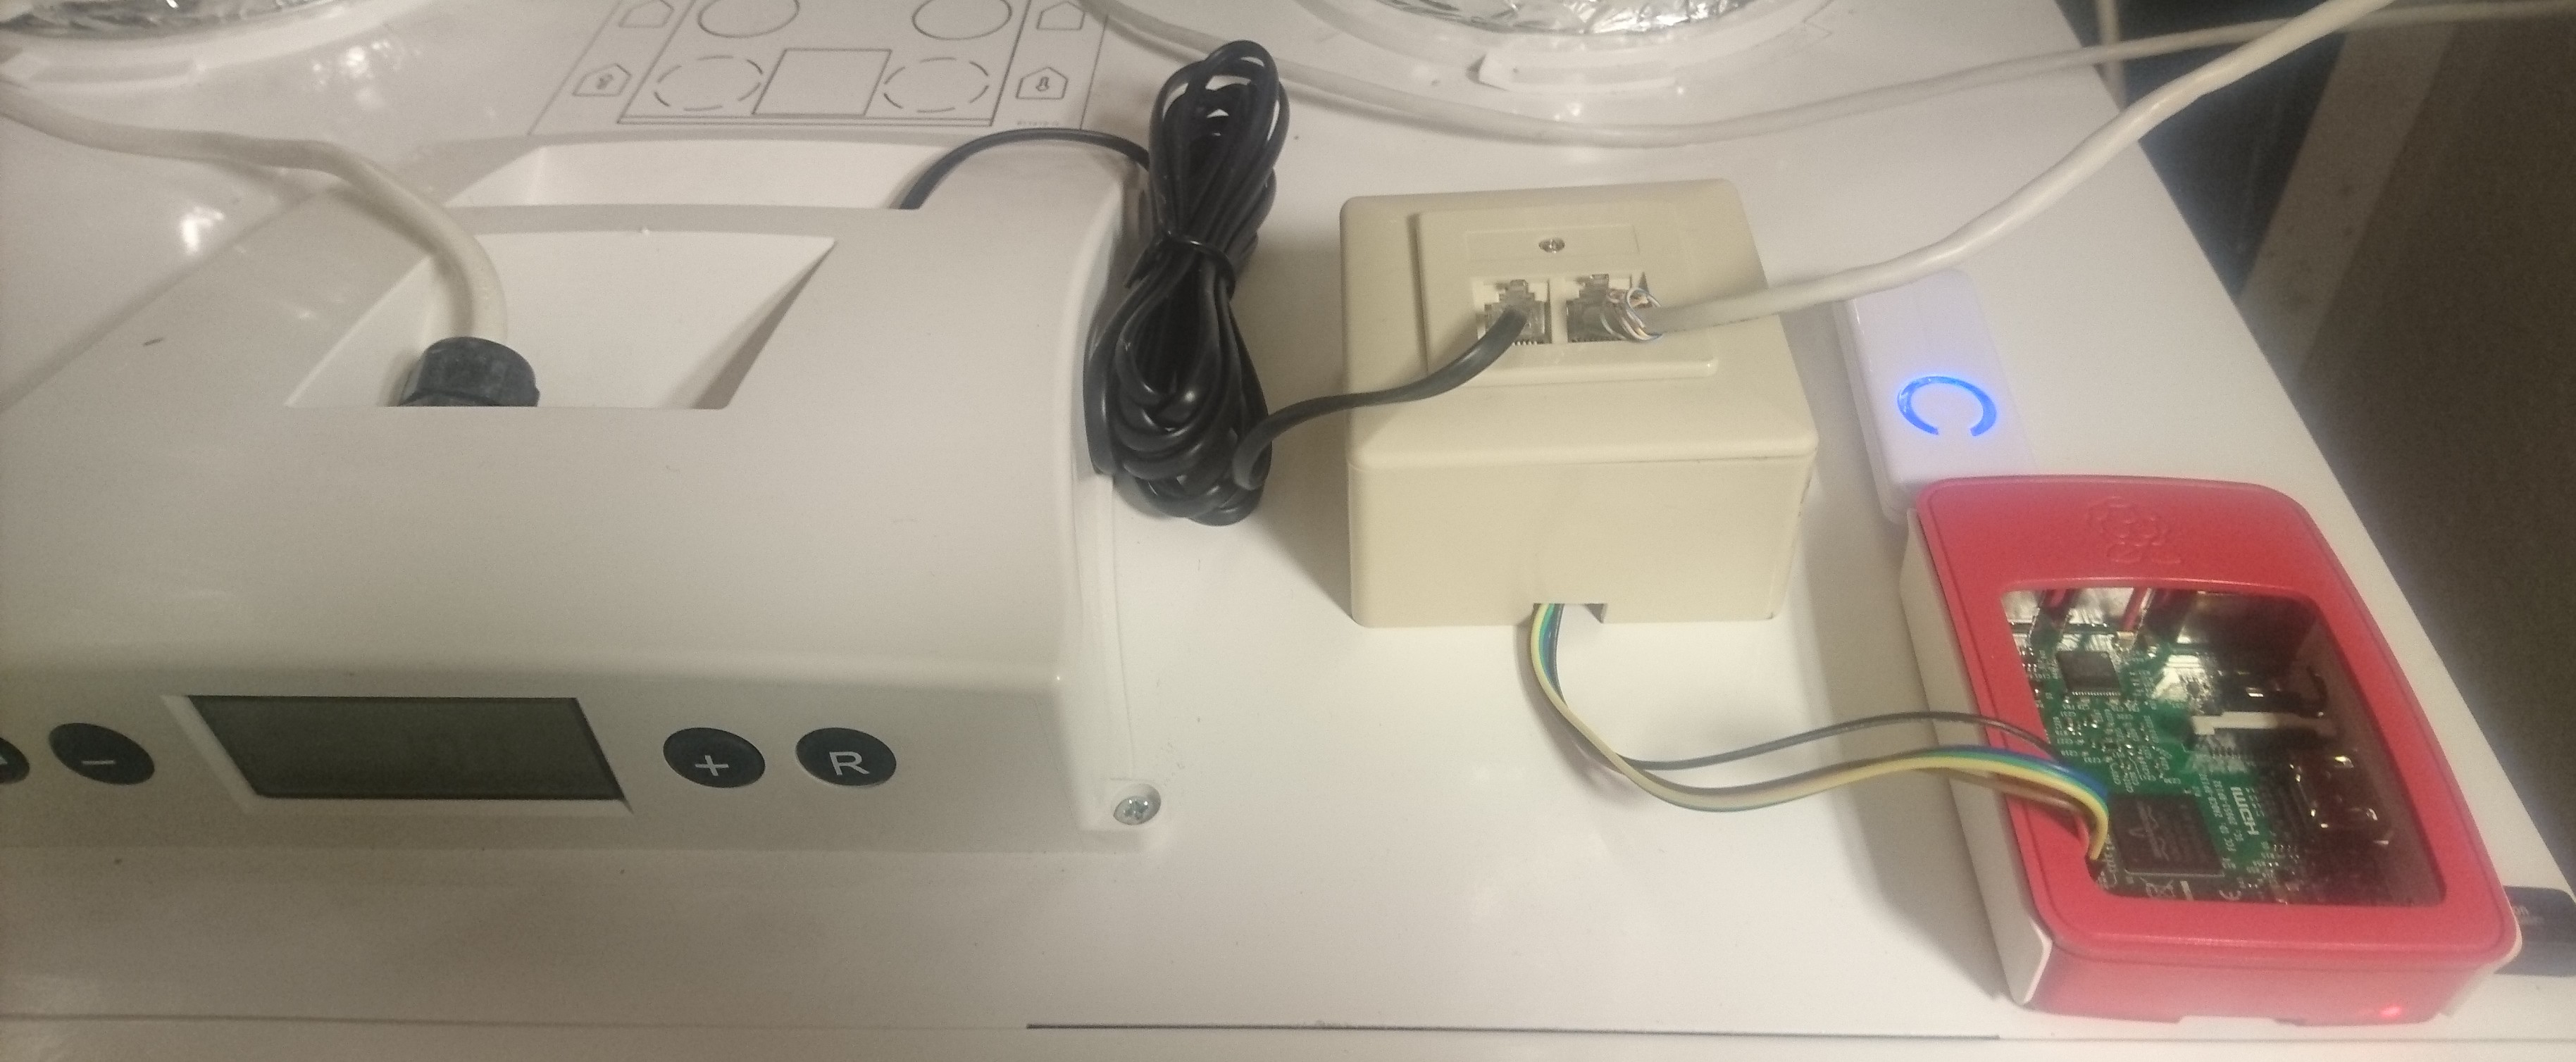
Pi, relay box and ventilation box assembled
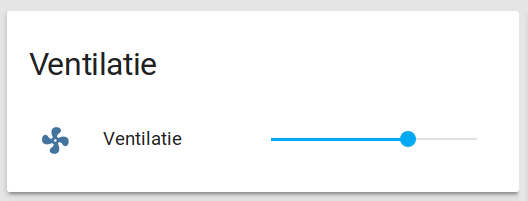
Now onto the Home Assistant configuration.
In configuration.yaml, add rpi_gpio 'switches' and an input slider that we will use as a control:
switch:
  - platform: rpi_gpio
    ports:
      2: ventilation 2
      3: ventilation 3
      4: ventilation 0
    invert_logic: true

input_number:
  ventilation:
    name: Ventilation
    initial: 1
    min: 0
    max: 3
    step: 1
    icon: mdi:fan
And in automations.yaml, create an automation that links the input number to the switches:
- alias: Schakel ventilation
  trigger:
    platform: state
    entity_id: input_number.ventilation
  action:
    - service_template: >
        {% if states.input_number.ventilation.state|int == 0 %}
          switch.turn_on
        {% else %}
          switch.turn_off
        {% endif %}
      entity_id: switch.ventilation_0
    - service_template: >
        {% if states.input_number.ventilation.state|int == 2 %}
          switch.turn_on
        {% else %}
          switch.turn_off
        {% endif %}
      entity_id: switch.ventilation_2
    - service_template: >
        {% if states.input_number.ventilation.state|int == 3 %}
          switch.turn_on
        {% else %}
          switch.turn_off
        {% endif %}
      entity_id: switch.ventilation_3
And finally in groups.yaml:
default_view:
  view: yes
  entities:
    - group.ventilation

ventilation:
  name: Ventilation
  entities:
    - input_number.ventilation
Which gives me the following in the Home Assistent web interface.
All done!
This is my first project using Home Assistant, so I'm probably not doing things The Right Way. But hey, it works. I can now use my phone to turn on the ventilation before getting into the shower!
Later I also connected a Fibaro Double Switch 2 to the light switches in the bathroom, so I can use those to control the ventilation and can even forget my phone :)